This is most complete and practical analysis and explanation of various piano skills I have ever seen.
Today's article is by far most complete, most detailed, most detailed, and most authoritative. There are not only analyzes, but also methods, not only detailed descriptions, but also repertory reference books. This is taken from chapter explaining basic piano techniques in "Learning to Play Piano by Liu Shikun". is a text version of their video tutorials. We have also published this episode of Liu Shikun's teachings before, and it is much loved and welcomed by everyone. To make it easier for everyone to learn and assimilate, text version is very necessary. Absolutely haberdashery, very practical, let's quickly master them~Basic piano skills can be classified from two points of view
1. Classify according to physiological structure and physiological function of human body, in particular, human hand.
According to classification of hands, basic piano technique is divided into three aspects of technology: finger technology, wrist technique, and hand technology.
Second, from classification of piano music texture structure.
Based on classification of texture structure of piano music, main technologies of piano playing are divided into four aspects:
Monophonic technique, octave technique, polyphonic technique, other specific form techniques.
Monophonic technique refers to technique of playing technical texture of a piano, in which monophonic notes are played one after other. This technique mainly includes four types: scales and arpeggios, trills, rehearsals and other monophonic textures without a single pattern.
The octave technique refers to technique of playing two unisons at same time, distance between which is an octave.
Chord technique is technique of playing chords consisting of several tones in a certain interval ratio.
Other specific forms of technology refer to other piano textures than most common piano textures mentioned above. Such as: double thirds with one hand; decomposition of octaves; breakdown of chords.
The pianos mentioned above are classified from two points of view, which are interconnected and unified.
The so-called monophonic technique is basically a finger technique. In entire hand, most important part of monophonic technique is finger.
The so-called octave technique, octave technique = wrist technique, basically wrist technique, most important part of octave technique is wrist.
The so-called chord technique, chord technique = normal hand, wrist and finger technique. These three parts are most important parts of chording technique.
The correct way to play in monophonic technique
First emphasize two points:
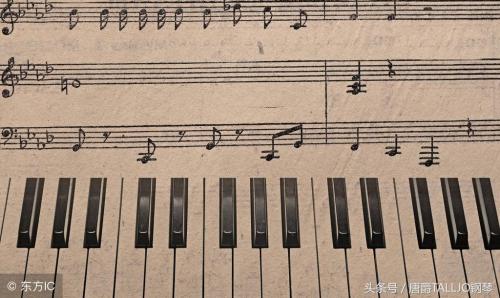
1. Explain monophonic technique for correctly playing scales and arpeggios. Since scales and arpeggios are most basic and common texture forms in technical monophonic piano textures, most of technical monophonic textures in piano music in world are actually scales and arpeggios or their evolution. These are those unscaled and arpeggio-monophonic textures, and methods for playing them are usually same or mostly same as scales and arpeggios. Therefore, it is most vivid and appropriate to illustrate correct technique for playing entire technical monophonic texture with scales and arpeggios. A rigorous piano student should constantly practice scales and arpeggios, because scales and arpeggios are foundation of all piano technique.
2. The playing method to talk about is basic method and basic method of practicing scales and arpeggios, not various specific playing methods that need to be changed according to different musical requirements of music.
The correct techniques for playing scales and arpeggios can be divided into fifteen points
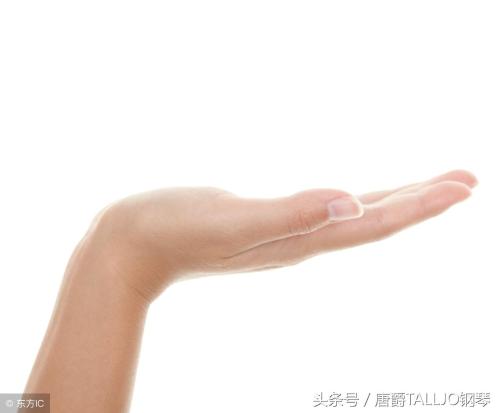
1. Bend your fingers and touch keys with your fingertips. When touching keys, except for tips of thumbs, rest of fingertips form a right angle of 90 degrees with surface of key and lean back slightly to main vertical angle. When touching keys, small knuckles on front of each finger should stand upright, forming an arched shape supported outward.
When playing piano, fingers must have a certain degree of hardness so that sound produced is strong and powerful. And if fingertips are to have hardness, small knuckles of fingers must stand upright; if they break, they should be soft and weak, and sound will not be full. Sound. Therefore, small knuckles of fingers should stand upright.
When playing piano, shorter fingertips touch keys, longer overtone vibration of piano sound will last. For ordinary piano players, if fingers are bent, reaction force of fingertips will be more flexible than straight fingers, and key touch time will be shorter than straight fingers. This is another reason for bending. fingers.
Secondly, when playing piano, fingers must be raised, each finger must be raised before and after each note, and fingers that have not been played for a while must also be raised. Keep your fingers bent as you lift.
When playing piano, fingers are raised so that fingers are at a certain distance from keys so that enough momentum can be generated and a strong and powerful sound can be produced,Oby sound has sufficient overtone vibration and length. In addition, raising finger while playing piano can also increase amount of finger movement and enhance training effect of finger playing function. That's why fingers are up.
Third, use palm joints of your hands as a point of strength
Use palm joint at intersection of fingers and palm as main point of power when playing. In order to apply sufficient strength to joints of palms, it is necessary to achieve following: 1. Agile movements 2. Wide range of motion 3. Power movements.
Fourth, when playing scales and arpeggios, fingers should be energetic and wrist and forearm relaxed.
The wrist and forearm are most stressful and tiring parts when playing piano, try to relax as much as possible. In this regard, many people have encountered a contradiction: when fingers are strong, wrist and forearm are subconsciously tense and tense, when wrist and forearm are relaxed, fingers are weak and weak. Try to coordinate relationship between them so that first shows strength, and second relaxes. This topic is more difficult but needs to be addressed.
5. To play scales and arpeggios, you must use your own independent finger strength and not use your wrists or forearms to apply pressure or force.
Many people play because their weak fingers blindly use their wrists and hands to apply pressure and increase strength, which often leads to two adverse effects: first, wrists and hands become so tired that it is difficult to continue playing. In some severe cases, hand even breaks, which becomes so-called "occupational disease"; in one case, a vicious circle is formed, that is, due to weakness of fingers, wrist and hand are used; dependence of hand, one's own strength must never be practiced and must always be relied upon. The standard of appearance for measuring presence of pressure and force on wrist and hand is to see if there is a lot of wrist and forearm shaking while playing. If vibration is strong, it means that pressure and force are being added; on contrary, if it is restrained so that it cannot vibrate much, possibility of pressure and force will be lost. Therefore, an effective way to overcome weakness of fingers and rely on wrist and hand is to strictly restrain strong shaking of wrist and forearm when playing, so that fingers can move independently without help of external force, and gradually develop independent skills.
Many parts of human hand, namely palm, forearm, upper arm, and even upper arm, can become tired from playing piano; there is only one place that will never get tired, even if it is played all day and night, and that is fingers. Therefore, only when fingers develop sufficient independent navBecause you don't have to rely on other external forces to play, you can play piano for a long time, freely and well.
6. When playing scales and arpeggios, palm, wrist, and forearm should be approximately in a straight line and nearly parallel to surface of key.
It is better that wrist is slightly lower than palm, but not higher than palm. Because there is a rule: when wrist is just below palm, sound will be firm, powerful and fruity, and when wrist is above palm, sound should be light, fuzzy, without fruity notes. feeling. Of course, some scales or textures of arpeggios in some pieces of music require effect of lightness or fuzziness, and wrist has to be played above palm, this is a special case, and this is another matter.
Some people play piano with their wrists above their palms and their forearms on both sides like a hump. In addition, some people add that their fingers are straight, not bent, like a crawling turtle, and sounds they make are also slurred. These bad habits need to be corrected.
7. When playing scales and arpeggios, height of inner and outer ends of back of hand should be approximately same, and entire back of hand should be mostly horizontal.
Among human fingers, ring and fifth fingers are weakest. Many people play piano because ring and fifth fingers cannot support them, causing ring and fifth fingers to be at outer end of back of hand, folding outward to form a back of hand that is high on inside and low on outside. Thus, sound produced by five fingers is weak and indistinct. Thus, a vicious circle often develops: weakness of fourth and fifth fingers causes outer end of back of hand to drop, and outer end of back of hand to drop, which, in turn, presses on fourth. and ring fingers, preventing them from fully lifting. The slack cannot be changed. The way to get out of this vicious circle is to strictly limit descent of outer end of back of hand when playing, and even consciously raise outer end of back of hand slightly when using ring and fifth fingers, to give ring and fifth fingers enough room for full movement. and increase their strength. Exercise slowly. Raise four and five fingers all way and pop-up sound is clear, bright and powerful.
8. When playing scales and arpeggios, front half of thumb should naturally curve slightly inwards, and there should be a slight gap between other half and palm.
Some people play piano with front half of thumb not bent inward, but turned outward, with other half of thumb tight against palm. Such a posture is completely contrary to physiology and nature. Can pto try, if thumb is turned outward, then not only thumb itself will be tight and tight, but entire inner half of hand will also be tight and tight.
9. When playing scales and arpeggios, fingers, palms, especially palmar joints, should be raised and straightened, and whole hand should form a natural “shelf” and “shape”. This "shelf" and "shape" should be neither tight, hard, nor loose or loose, but should be elastic, soft and hard, in a natural state.
Some people play piano with clenched, hard and hard hands like iron claws;
10. When playing piano, including scales and arpeggios, entire hand should be in a natural position that feels appropriate and comfortable.
Some people play piano with their elbows and arms close to their bodies. There are also people who play piano with their elbows and arms too high. These are bad habits and should be corrected.
XI. Playing Scales and Arpeggios, Right When hand is played up or left hand is played down, thumbs of both hands should be bent inward and placed under palm immediately after each note is struck.
When thumb is abducted, there are several things to do:
1. Relaxed, natural, not tense, prim;
2. Receive at same time as next finger is played, not later;
3. Take decisively and quickly, without hesitation or slowness;
4. When you get bottom, don't just take half;
5. When retracting, height of wrist remains unchanged, and wrist cannot be bent.
Why does thumb need to be pulled back? Because in scales and arpeggios, each key to be played with thumb is separated from other keys, and there is a certain distance from each other, when you reach next key position, you can play it calmly. If it's not removed when it's time to play next key, thumb is still on original key and there's still a certain distance to next key, so you can only jump to play with crutches. Every time thumb jumps hard, wrist and forearm will shake up and down. Not only does it look ugly, but sound that comes out is also a mess. As for important requirement that thumb be abducted, many pianists ignore it or don't even know it. A special reminder to everyone to pay attention.
Twelve, when playing scales and arpeggios, when playing down with right hand or up with left hand, movement of raising three or four fingers of both hands after thumb must be performed realistically.
Because when playing with three or four fingersthey should overlap and pass over tip of thumb, span of fingers is relatively large and movement is difficult. Many people often find it difficult to play here, and only focus on getting three or four fingers to play in correct position and make a sound, but ignore two-finger raise and corresponding playing effect. Some even turn their elbows and wrists to reach desired key with three or four fingers, sound is muddy, fuzzy and looks ugly.
Proper method of playing: when thumb is pressed, three or four fingers are bent and raised at same time, and then pressed; when three or four fingers are raised, palmar joint and front of palm are also raised; and wrist should maintain its original height, not arch.
Thirteenth, when playing scales and arpeggios, there are two important criteria for touching fingers:
1. Try to concentrate on moment your finger touches key;
2. Try to reduce moment when your finger touches key.
To reach last point, fingers must be agile when pressed and release key as quickly as possible after pressing (not for slow playing scales and arpeggios).
Many people think that most difficult and important part of finger movement when playing piano is playing with finger; also more than undershot.
The aforementioned finger should be released from key as soon as possible after finger is depressed, not for slow playing of scales and arpeggios. Because when playing slowly, each time finger presses a key, it must linger on key for a moment before taking next key, and it is impossible to immediately leave key and lift it up.
Fourteen, while playing piano's technical monophonic texture, including scales and arpeggios, among various parts of hand, two are most important, namely palm joint and fingers, including small joints of fingertips. .
The main functions of palm joint are to activate play action of finger, send play force of finger, and control transformation of fingers.
The main function of fingertips is to transfer force of fingers to keys, and to precisely control and adjust touch of fingers in process.
Some people are not good at playing piano. Ultimately, joints of palms and fingertips are not strong enough. Therefore, finger skills training should focus on training palm joints and fingertips. Make knuckles of palms flexible and powerful, and tips of fingers hard and sharp.
Fifteen, when playing scales and arpeggios, player must treat every note, every key, and every finger as an independent organfrom point of view of internal concept and self-awareness, but sound and sound, tonality AND keys, fingers and fingers are not connected to each other, confused, but stuck together, one after another, clean, neat, clear.
People often use word "detail" to describe above requirements. The so-called "detail" includes four characteristics:
1. Flapping sounds are like grains and grains, each of which is independent, stands out, distinct and distinct;
2. It seems that every sound played has a solid foundation, sound is concentrated and full;
3. The keys are pressed quickly, and each sound appears with a clear gap;
4. All emerging sounds are even, regular and united with each other.
Standard effect when playing scales and arpeggios:
1. The flapping sound is concentrated, powerful, direct, full and distinct.
Some people play, sound is weak, ethereal and fuzzy. If visual image is compared with auditory image, then it is like a photograph with a defocused and blurred scene, which is completely of poor quality.
2. Play accurately, cleanly, clearly, smoothly and smoothly.
Some people play with constant leaks and bugs, some play fuzzy and choppy, some play choppy and stutter. It's all poor quality.
3. Play evenly. A single range includes three aspects: speed, power and timbre.
Someone plays fast and slow, and speed is unstable, someone plays strong and weak, with different strength; Also not up to par.
4. The pop-up tone is bright, transparent, and thick, with a long pronunciation, ample overtones, and resonance.
Some people play, tone is dark, dull or dry, which also breaks standard.
5. Playing with two hands is generally not very accurate, but very accurate. The game effect is like two rows of even human teeth, not intertwined and uneven. It should be noted that in recent years, world piano scene has paid more attention to uniformity of playing than in past.

A few practical rules for playing scales and arpeggios:
1. It is best to play four octaves every time, and children are same.
2. In addition to basic practice of playing with two hands in same direction, you should also practice splitting hands.
3. Practice slow, medium and fast. But don't train if you are too fast. After pressing each key, finger remains on key for a long time before pressing next key, which is too slow. Because this game method is different from actual requirements of normal game.
4. You should mainly practice major and minor parallel octaves and arpeggios. Also practice other scales and arpeggios (including harmonic minor and natural minor). Also practice chromatic scales, two-handed thirds, sixths and tenths, and arpeggios for dominant and diminished seventh chords.
Techniques for playing octaves and chords
The octave technique is one of most commonly used, important and complex piano techniques. There are many more pianists with poor octave technique than with monophonic technique and other poor techniques. Even among famous pianists there are people whose octave technique is not very good. There are not many pianists in world with very high octave abilities.
The octave technology is mainly used for wrist, because wrist is key part of human body technology for playing octave. Why? This is determined by physiological structure and physiological functions of human body. Human hand joints include finger joints, palm joints, wrist joints, elbow joints, and shoulder joints. Among them, playing octaves, joints that can be used as axis of movement of arms can only be three joints of wrist, elbow and shoulder. No one can play octaves using knuckles or knuckles of hands as axis of action. Among three joints of wrist, elbow and shoulder, if octave is played with elbow joint as axis, motion response will be cumbersome and slow, and it is impossible to play quickly.
If you play an octave with shoulder joint as axis, movement response will not be as good as elbow joint. With wrist joint as axis of action, response to action is very sensitive and movement can be reproduced quickly. Therefore, playing octave should take wrist joint as axis of action, respectively, power of playing octave and control of playing position should also be mainly on wrist. Therefore, we say that key part of human body's technique for playing octaves is wrist. This does not mean ignoring important role of other parts of hand in playing octaves. To play an octave, in addition to wrist, it must be flexible, strong and elastic, palmand fingers must also be firm and strong so that they can be firmly supported when touching keys, so that force from wrist can be condensed. and is completely transmitted through palm and fingers to keys.
If palms and fingers are weak and weakened, then no matter how strong wrist is, power will be greatly lost as it passes through palms and fingers, and sound produced will be empty, scattered, floating, and floating. In addition, if volume is sufficient to reproduce octaves, then strength of one wrist is not enough, but strength of forearm and even forearm must be added. Therefore, when playing octaves, other parts of hand are also very important.

You are a beautiful red rose and dear cinnabar in my heart
The correct way to play octave
It should be noted that what is mentioned here refers to basic technical or cadenza texture octave (CADANZA) method, and not to LYRICAL OCTAVE-MELODIE method, or various other special methods , which vary according to various musical requirements of piece of music.
First of all, we will talk about method of playing octave in general volume, which is also method to be followed for basic octave exercises. After that, let's talk about how to play octave of volume.
The correct way to play OCTAVE can be summarized in fifteen points:
1. When touching keys, palm, wrist, and forearm should be approximately in a straight line and nearly parallel to surface of keyboard. If wrist and forearm are higher than palm and volume is normal or low, sound will be light and floating.
An octave of several pieces requires this lighting effect, and wrist and forearm must be higher than palm to play. But in general, especially when performing basic octave exercises, wrist and forearm should never be higher than palm.
Some people play piano with one part of wrist bent high, higher than front and back of hands and forearms. This shape of hand violates human physiology and nature, and sound produced will be abnormally weak or hard. . This odd look needs to be corrected.
Second, play an octave of overall volume and keep your forearm in a stable position. The whole arm should move up and down with wrist as an axis. The amount of movement depends on strength of playing volume. As a general rule, louder volume, better movement *R> But main practice of octaves, especially when practicing octaves for first time, greater range of motion more better to increase number of movements and enhance effect of practice. However, people with high octave skills tend to have a small range of motion, due to their strong wrist skills, they can complete various requirements with little movement. But their skills must come from long and thorough practice.
Third, when playing an octave of normal volume, use your wrist as your main point of force. The wrist should be both firm and relaxed.
During game, conflicting relationships between two characters in same part must be adjusted at any time to make them harmonious and unified. If there is too much force and not enough relaxation, movements will be stiff, pronunciation will be sharp and abrupt, and hands will be too tired to play in flow.for a long time; otherwise. If there is more than enough relaxation and not enough strength, fixed movements will be loose, pronunciation will be blurry, and hands will get out of control and clapping erratically. When applying force to wrist, it is necessary to use free and natural skillful energy instead of hard and dull clumsy energy, especially in order to fully unleash internal elasticity of wrist itself.
Fourthly, play an octave of overall volume, arms (especially forearms) should be relaxed, and do not use hands, especially forearms, to apply pressure or add force.
Many people use their hands, especially their forearms, to put pressure on them and blindly force them due to lack of wrist strength when playing octaves, which often leads to two bad consequences: first, their hands, especially their forearms, becoming second, often form a vicious circle, that is, due to insufficient strength of wrist, hand is used, and because of hand at wrist, dependence on hand develops, and one's own strength cannot always be practiced. Out, always rely on hand.
Breaking vicious circle of difficulty is to allow arms, especially forearms, to completely relax and deprive pressure and force, so that wrist can move on its own without external force, and gradually develop your strength. Independent skills, do not need stretch your arms.
5. Playing octaves requires full use of natural rebound force and inertia force as hand rises and falls. Played in this way, one of them is full of elasticity and gives a bright effect; other saves labor and can be reproduced for a long time.
Some people don't know how to use that kind of natural power when playing octaves.
Sixth, to play an octave of technical or colorful textures, it's usually best to play with your thumb and little finger together. In non-specific circumstances, it is better not to replace thumb with four fingers at same time.
Because sound produced by thumb and little finger together, sound produced by thumb and four fingers together is more concentrated, straight, clear, grainy, supple and pure.
7. When playing octave, small joints at front end of thumb and little finger should be bent and straightened, and whole finger should be firm. Use outside of tips of your thumb and little finger to touch keys, and touch surface should be small, not *R> Some people play octaves, fingers are loose, small joints are loose, and they keep shaking like sweeping. on piano The sound is scattered and fuzzy. This bad form needs to be corrected.
8. When playing octaves, playing and non-playing fingers should be naturally bent.and straightened, and knuckles of palms should also be straightened up, forming a natural "shelf" supporting up and down. outside. mold". This "shelf" and "shape" should have a certain degree of tension and hardness, but not be stretched or tight, and when played, only perform a general up and down movement with axis of wrist, and its own shape will not change.
Some people play octaves, their arms are not straight and fixed, and they shake like a brush. This bad habit needs to be corrected.
Ninth, play octaves, height of inside and outside of back of hand should be about same, and whole hand should be mostly horizontal.
Many people play octaves because of weak support of little finger, which causes back of hand to tilt and drop, causing back of hand to be high on inside and low on sound. Thus, a vicious circle often occurs: a weak little finger causes back of hand to drop, a sunken one presses on little finger, making it difficult to complete movement, and cannot exercise its own movements. strength, so that sunken back of hand cannot be changed. The way out of this vicious circle is as follows: during game, try to support little finger so that back of hand does not fall; even consciously lift outside of back of your hand a little to give your little finger enough room to move fully. so that he can slowly develop his strength.
Man with a paper envelope near a wooden piano
Ten, play an octave of normal volume, arms relaxed and hands tight and firm.
This is a contradiction and difficulty: often arms are relaxed and hands are relaxed and weak; hands are tense and hard, and arms, especially forearms, are also tense and constrained. Try to harmonize them. Method:
1. Mentally distinguish between them, think and feel relaxation at same time, and contraction and firmness in another;
2. Master strength and relaxation of wrist. The wrist is junction of arm and hand, and is closely related to two. If relationship between strength and relaxation of wrist is mastered, then similar relationship between arm and hand will be easy to coordinate.
Eleven, there are three ways to reproduce relative volume ratio between two octaves:
1. The center of gravity of left and right hands is concentrated respectively on thumb of left hand or little finger of right hand, highlighting high notes of octave played by these two fingers;
2. Unlike first, center of gravity of force is located on little finger of left hand or thumb of right hand, respectively, highlighting lower notes of octave played by these two fingers. ;
3. The centers of gravity of both hands are balanced, and volume of left and right hands is almost same.
The first type of pop-up effect is crisper, livelier, brighter and more radiant, with stronger rhythm and graininess; a lot of; third type of popup effect is between first and second types. Players should choose one of them according to requirements of music being played and with a clear goal in mind.
Among human thumbs and little fingers, thumb is innately strong, while little finger is weak. Playing on octave thumb tends to produce a more natural sound than playing on little finger. In this regard, you should always pay attention to corrections during game.
Twelve, in addition to special requirements for playing octaves, at moment you touch keys with your finger, you need to concentrate on strength, and other should have a short time. Thus, sound of piano is loud and long.
Thirteen, key part of octave technique in human body is wrist, and second most important part after wrist is tips of thumb and little finger, including small joints in front of thumb and little finger.
The main functions of wrist when playing octave are: to initiate playing action of hand and to act as axis of action; send game hand effort; control position of hand.
The functions of fingertips are basically following: support falling keys of hand; transfer force of hand to keys; finely tune touch of your hand.
Many people don't know how to play octaves well. The main reason is inability to play with wrist, and second is inability to play with fingertips. Thus, in order to play octave well, it is important to practice appropriate playing skills of wrist and fingertips, that is, wrist must be flexible, strong, elastic and durable, and fingertips must be hard and sharp.
14. When faced with long and fast successive octave passages, even those with good command of octave will inevitably get more and more tired playing from behind. If you want to play smoothly without getting stuck because your hand is too tired, you must master hand, especially relaxation of forearm, and adjust power consumption of hand throughout game so that hand is still strong at end of piece.

Fifteen. When practicing octave for first time, you can start with following basic practice methods:
1. Press one key several times and then switch to another key.
2. Play different octaves and arpeggios;
3. Play various progressive octave sound patterns as defined by you.
In first practice, it is desirable to play more separately and more slowly. There are not many octave studies and you can practice at beginning, for example Czerny's etude, Op.740, No. 49 and so on. After you have mastered skills of playing octaves initially, you can also select a few octave passages in music to practice. Of course, these transitions are more difficult. See playlist below:
Mozart's Sonata in A Major, Op. 331
Chopin's Polonaise in A Flat Major, Op. 53
Study of Paganini "The Bell" by Liszt
Advanced study of Liszt "Hero"
Funeral List
Rigolette Lister
Spanish Rhapsody by Liszt
Liszt's adaptation of Schubert's The Devil
Liszt Sonata in B minor
Liszt Piano Concerto No. 1
Tchaikovsky's Piano Concerto No. 1
MOSHKOVSKY "Acrobatics" op.52 №4
The method of playing high volume octave is basically same as general volume octave. There are six differences:
1. To play a strong octave of volume, in addition to using wrist strength, both hand and arm strength should be used. The arm strength used is generally equal to arm strength of forearm; when volume requirements are very large, increase arm strength. Hand, wrist, handplay and strength must be coordinated and combined into a single whole. When using arm strength, there are usually three ways to play:
1. The wrist is axis of play movement, and forearm and elbow are slightly higher than wrist, so that strength of hand can completely fall and concentrate on hand, especially on fingers.
2. With wrist as axis of action, palm, wrist, forearm and elbow form a straight line with each other and are basically parallel to keyboard surface and play together vigorously.
3. The elbow and wrist are axes of play action. During play, hand, wrist and arm move up and down as one unit. This playing method has a loud sound, a strong sense of elasticity, full of momentum and courage, but it is only suitable for playing a slow octave or a slow part at beginning of a fast octave.
Secondly, when using hand and arm strength to play volume octave, wrist must be used as a key part of power of movement, and it must be flexiblethem, powerful, elastic and full of energy. Some people play octaves with stiff wrists and there is no ups and downs between same hands, they just fade together and move together, and sounds they make are hard, hard, weak and superficial. This bombing method needs to be fixed.
Third, when playing a strong octave, distance between fingers and entire hand and key may be slightly larger before and after each touch than when playing a normal octave, especially when playing a slow and strong octave. . Because if you are further away from keys, you can use more of natural inertial force of hand's fall, which saves effort and allows you to play louder.
Fourth, play an octave between strong intervals that are not fast. When hand is lifted between notes, try to relax as much as possible so that there is a buffer and a break to reduce fatigue.
5. For fast and strong successive octave passages, it is not possible to completely relax hands. Some degree of tension is normal and acceptable. Especially late in game, hand may even use all of its remaining strength to end game like a nervous sprint.
6. When playing high volume octaves, aforementioned correct methods of playing general volume octaves should be used, especially small joints in front of fingers should be bent and straightened, and fingers should be straightened. , joints of palms should be straightened, and other points should be strengthened.

Standard effect that octave playing should achieve:
1. The sound is tight, full, bright and tight.
Secondly, voice is convex, direct and three-dimensional.
Third, sound is clear, crisp, clear and grainy.
4. The voice is sharp, short and resilient.
5. The rhythm is accurate, sensitive, bright, with a sense of rhythmic dynamics and attractiveness of rhythm.
Six, accurate pronunciation. When playing an octave with one hand, two notes that make up octave go in order with each other; when playing an octave with two hands, two octaves go in order with each other.
How to play chords
Depending on characteristics of music, chords can be roughly divided into following types:
One, grandiose and brilliant, such as Grieg's "Piano Concerto"
Second, powerful and majestic, such as Schumann's "Carnival"
Third, worthy and worthy. For example, Beethoven's Pathetique Sonata, Op. 13
The fourth, warm and passionate, such as Liu Shikun and Fan Yiming's Youth Piano Concerto
Five, wide and open, such as Tchaikovsky's First Piano Concerto
6. Intense and continuous, such as Schubert's Improvisation in A flat major, Op. 90 No. 4
Seventh, harsh and dry, like Prokovev's "March from Love for Three Oranges"
VIII. Tragic and heavy, such as third movement of Chopin's "Sonata No. 2 in B Flat Minor" "Funeral March"
Nine, gloomy and harsh, such as Beethoven's Sonata Dawn Op. 53
Ten, full and steady, such as Schubert's Improvisation in A Flat Major, Op. 142 No. 2
Eleventh, deep and energetic, such as Beethoven's Passionate Sonata, Op. 57
Twelve, majestic and elegant, such as Mozart's Sonata in F Major, Op. 332
Thirteen, dexterous and quick-witted, such as Ding Shangde's "Children's Suite" Jumping Butterfly
Fourteen, lively, merry, like Blue Danube Strauss
Fifteen, lyrical and wishful thinking, such as Tchaikovsky's First Piano Concerto
Sixteen, soft and elegant, like Wanlige "Spring"

There are countless types of chord music characteristics such as subdivisions, and there are many chord music characteristics that fall between two or more of chords described above, so it's impossible to describe them all. The above are only most typical and common.
Due to variety of musical characteristics of chords, there are also different ways to play chords that are difficult to describe. Some of most basic chording techniques are described below.
1. In order to play chords, except for certain chords that require a floating sound effect, fingers, especially small knuckles at front of fingers, must stand upright and have a certain degree of hardness. . The palms, wrists and arms should be loose and soft, and whole hand should be basically soft at top and hard at bottom, light at top and heavy at bottom, so that playing force can be fully distributed. especially fingertips going down to keys. In this way, pop-up sound can be full and complete. Some people play chords with soft and relaxed fingers while palms, wrists and arms are tense and still, or all palms, wrists and arms are soft and relaxed, or all are tense and still. The sound that appears may be faint and unclear, or hard and harsh, making it difficult to hear.
Secondly, when playing a normal chord, wrist should be slightly raised before playing chord and down when playing chord. The palm is raised so that there is room for a fall; wrist is lowered so that playing force can be completely lowered and concentrated on fingers, especially fingertips, for full sound. In this regard, it is necessary to learn following points:
1. When raising and lowering wrist, wrist itself and palm and forearm connected to it should be relaxed, and playing fingers should be straight and firm. In this way, playing power can be fully released and focused on fingers. Some people play chords. Although wrist rises and falls, wrist, palm, and forearm are also relaxed, but fingers are also relaxed. Thus, power of playing cannot be fully released and concentrated on fingers, and most of them follow wrist. The pop-up window is naturally blurred. Someone vividly said: "If you play like this, then not much force hits keyboard, and most of it dissipates into space under keyboard."
2. The moment wrist falls, wrist should be fully relaxed and force of fall created by relaxation will naturally decrease rather than being pressed hard against it. The sound reproduced in this way can be both full and loose, moreover, even if volume reproduced by forcesnaya, hand will not strain much.
3. The power of game must be fully released and concentrated in fingers, especially fingertips, and not only partially, a part must remain in palm, wrist or hand.
4. When playing simple or non-jumping common chords with wrist up or down, tip of playing hand should always rest against surface of key. When changing a chord, fingertips should reach and stick to keyboard surface of chord to be changed before playing. Some people play normal chords. Before playing keys, their fingers do not stick to keys, but swing freely and softly down from top of keys. Some people play chords from time to time, but do not play with their front fingers or stick to keys, fingers form a rigid whole with palm, wrist and hand and lie together in a bulky and sluggish manner. The sound is shallow, weak and empty. 5. There is a difference between speed and deceleration of moment wrist falls. As a general rule, louder and stronger chord played, faster wrist drops.
Third, to play jumping chords, playing method is basically same as for octave. Also wait.
Fourth, when playing strong and hard chords, fingers, palms, wrists and forearms can be combined into one body, basically taking elbow as axis of action and playing up and down as a whole. Thus, fingers must be firm and vertical, palm must be supported, and wrist must be sharp and elastic. This playing method, pop-up sound effect is solid, full, loud, full of resonance and three-dimensional feeling, but it is relatively complex, so it is only suitable for people with a higher technical level.
Click here to subscribe
More about musical instruments
This is most complete and practical analysis and explanation of various piano skills I have ever seen.